|
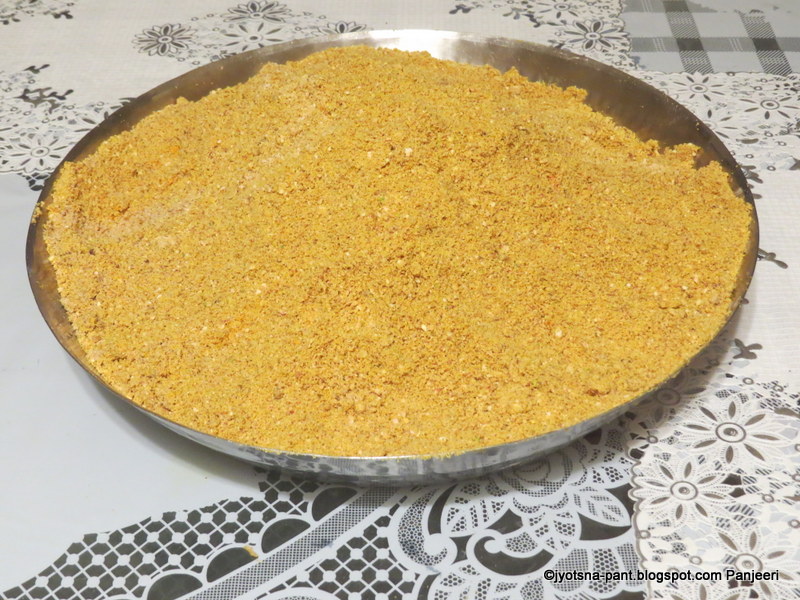
| Low Fat Panjeeri |
We used to wait eagerly for the
fasting and Puja to finish so that we could partake the yummiest Panjeeri my
mother used to make on the day of Krishna Janam
ashtami. Panjeeri is usually made in liquid/laddu (balls) or barfi form. Normally
loads of ghee (Clarified butter) is used in all forms. This is a quintessential
nutritional thing included in post-natal diet in most of the India.
I tried to make more healthier and
nutritious version and made the powder form of Panjeeri. It does not have white
sugar and very less ghee, Thus best for not only diet watchers but for diabetic
people and people suffering from high cholesterol. This Panjeeri is full of
energy, proteins, vitamins, essential oils, micro nutrients.
This Panjeeri is extremely good
for the mother (post-natal) as it helps alleviate joints and back pain,
increases lactation, has many remedial properties along with being very tasty.
This version of Panjeeri can not
only be taken by ladies after delivery but by one and all replacing energy bar
and drinks. Just take two spoons after meal instead of dessert. It is
nutritious as well as satiates the sweet tooth.
I usually add Asteracanth Longifola/Starthom/ Talmakhana to add body to the Pangeeri. Again Talmakhana also has immense medicinal and nutritive value.
Due to different weather, climatic conditionds and local produce few ingredients may differ from state to state but Nuts, Gond (Dragon Gum), Turmeric Sunth (Dry ginger powder) aare few common ingredients.
Preparation Time: 10 minutes
Making Time: 30 minutes
(Roasting)
Grinding Time: 20 minutes
Servings: Makes approximately 2
kg
Nutrition value For 20 gm of
Panjeeri Powder (Approximate values)
- Energy: 69.50 Cal
- Carbs: 15.00 gm
- Fats: 5.695 gm (Mostly
Polyunsaturated)
- Cholesterol: 0
- Proteins: 12.2gm
- Sugar: 3.25 gm
- Sodium: 0.135 mg
- Potassium: 83.50 mg
- Extremely rich in Rich in Iron,
Calcium, Magnesium and Vitamin B6, Vitamin B12,
- Rich in Vitamin A, Vitamin C,
Vitamin D
- Rich in essential oils
Thus it can be evaluated that
apart from having energy it also provides with much needed Micronutrients ,
Vitamins and is also good for digestion (Due to presence of Carom seeds).
Turmeric, Ginger powder and Carom seeds also impart anti-bacterial properties.
Gond/Dragon Gum/Goats horn/Gum
elect helps to regularize the blood flow after delivery and helps in back and
body pain and aches. Strengthens the body on the whole.
Ingredients For Making
Panjeeri:
- 250 gm Almonds
- 250 gm Cashew nuts
- 250 gm Pistachio
- 250 gm Walnuts
- 150-200 gm Raisins (Kishmish)
- 750 gm Dry Dates Powder/ Dry dates
pitted (Chuhara/Khari/Kharik)
- 200 gm Gond/ Tragacant Gum/ Cooking
gum/ Dragon Gum
- 100 gm Carom Seeds (Ajwain)
- 50 gm Dry Ginger Powder (Sunth)
- 50 gm Turmeric Powder (Haldi)
- 3-4 Teaspoon Ghee (Clarified butter) / Olive oil
Direction For Preparing
Panjeeri Powder:
- In a thick bottom wok roast
Almonds, Cashew, Pistachio and walnuts separately.
- While roasting, keep the heat in
medium/low depending upon your stove heating. High heat will cause the nuts to
get over cooked/ burn.
- The nuts should be removed from
hot wok immediately when the change color and nice roasting aroma stats coming.
Since nuts are full of essential oil thus they tend to keep cooking while in
the process of cooling also.
- Once the nuts are roasted allow
them to cool.
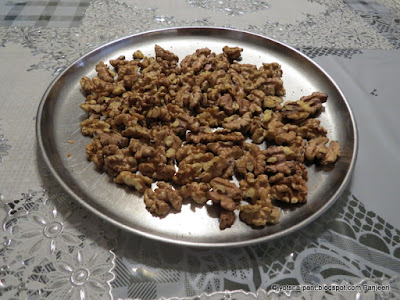
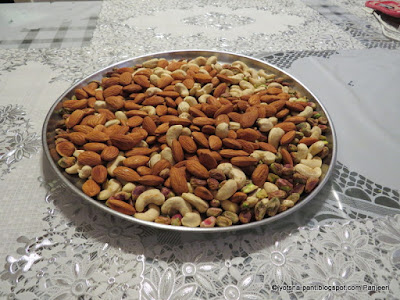 |
| Roasted Nuts |
- While roasting walnuts special
care should be taken as they turn bitter if overcooked. In a hot wok they will
take 4-5 minutes only to get roasted.
 |
| Walnuts roasted |
- Keep stirring continuously while
roasting to avoid some nuts to get burnt and some remaining unroasted.
- After nuts roast ajwain with
continuous stirring.
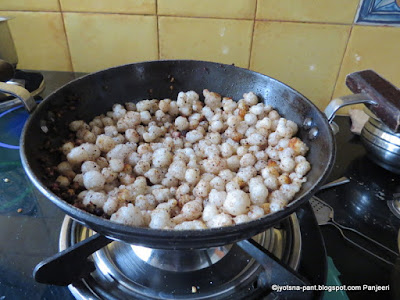
- Pound the gum to small pieces and
roast it in medium heat with continuous stirring. After two three minutes of
roasting they will start swelling, popping and will change the color to white.
 |
| Dry Roasted Gum |
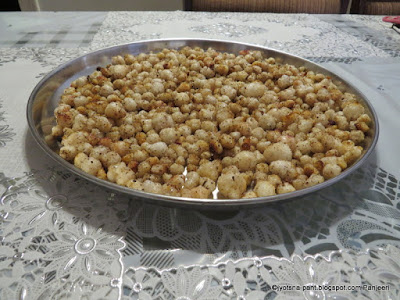
- Add 5-6 tea spoons of ghee and
bring the heat to high, stir continuously. Further popping will occur. Bring
the heat to medium again till all pieces have been cooked. It will take another
4-5 minutes maximum. Some small pieces may get charred, they can be discarded
later. But all pieces should be cooked nicely.
 |
| Roasted Gum Cooking with Ghee |
 |
| Gum Cooked after adding Ghee |
- Switch off the heating and remove
the popped up gum from wok and allow it to cool. Removed the pieces which have black due to charring. (They will be few but should be removed)
 |
| Cooked Gum after removing all blackend particles |
- In the same wok add 1 teaspoon
ghee and roast Turmeric and Dry Ginger powder separately. Remove the roasted
ginger powder and turmeric from wok and let it cool.
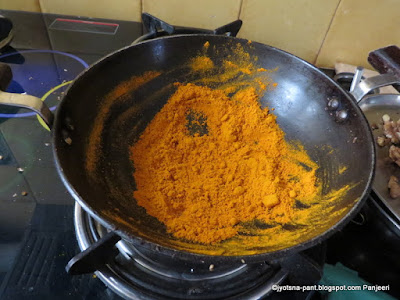 |
| Turmeric and Dry Ginger Powder roasted on low heat |
- Again in the same wok roast dry
dated powder in manageable portions for 3-4 minutes on low flame(Just to remove
if any moisture).
- On low flame dry roast Raisins for 2-3 minutes.
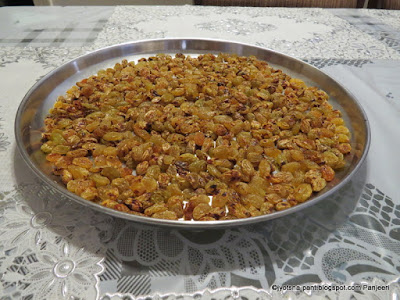 |
| Roasted rasins |
- If you are takingDry Date pieces then
roast them, cool them and then grind to make nearly fine powder. Do not sieve
because the slightly coarse pieces will add texture to the powder.
- Grind all roasted nuts together to
fine powder.
- Grind ajwain to fine powder. if
required sieve and grind the coarser particles again to get fine powder.
- Now grind the cooked gum. After
pulsing the gum for a minute or so add little dry dates powder, then pulse
again to get fine powder. The dates powder is added to absorb the ghee and
facilitate the grinding.
- Take 4-5 Tablespoon of dry dates
powder and add the roasted raisins to it. Pulse so that the raisins become
small pieces. The raisins are not to be pulsed much else the whole mixture will
become gooey.
- In a big shallow plate/container
place:
- Nuts powder
- Dates powder
- Ajwain powder
- Raisin ground coarsely
- Gum powder
- Dry Ginger and Turmeric powder
- Mix with your fingers or using a
ladle till all ingredients are mixed nicely to give a homogenous mixture.
 |
| Low Fat Panjeeri |
- The sweetness will be imparted by
Dry Dates powder, so sugar/jaggery is not to be added.
- Store it in an airtight container.
- This mixture lasts for more than
six months in fridge and more than three months 0utside fridge, provided it
does not finish before that time.
How To Take It and Who Can Take It:
- Post-natal it should be taken 3-4
days after delivery; 2 teaspoons with cup of milk (Do not mix it in milk. Eat
it and drink milk) twice a day, preferably before breakfast and before going to
bed.
- Apart from this it can be taken by
anyone after meal instead of regular desserts.
- Anyone suffering from anemia or
weakness, this powder is very helpful.
- Apart from being nutritious it
helps the feeding mother to overcome flatulence, reduces the body pain, lactation
increases and the milk is healthier for the baby.
- Even though Panjeeri does not have
anything causing adverse reaction yet one should be careful if allergic to any
ingredient mentioned above in the article.
Tips:
- Remember that nuts and seeds have
essential oils thus they keep on cooking while kept for cooling thus remove
them from heat when the color starts changing and the aroma of roasted
nuts/seeds starts coming. Care should be taken that over roasting does not
happen. Else the taste will be spoilt beyond redemption.
- All burnt particle of gum should
be removed before grinding.
- Turmeric should be roasted on low
heat.
Suggested Variations:
- Grated coconut can be added to the
mixture after roasting and grinding.
- Melted hot ghee can be added to
the mixture of all powders and small size balls can be made out of it. But this
will turn rancid in a month in hot weather, and if stored in fridge the ball
before eating should be heated to room temperature. Beware it will increase the
fat content of Panjeeri.
- If making balls/laddu some of the
roasted nuts can be cut to fine pieces and then added to the Panjeeri.
- To bring the cost down some of the
Dates powder can be replaced by sugar/jaggery, but this will bring down the
nutritional value and add pure calories to Panjeeri. Sugar powder will change
the physical state of Panjeeri but jaggery may make it a little gooey.
- If you want to add more body to
the Panjeeri then roast 100 gm of Tal makhana (Astaracanth Longifola/Starthom), grind to fine powder and add to
the rest of the powders before mixing.
- For slight sharp taste the amount
of Dry Ginger powder can be increased to 100 gm and Ajwain (carom seeds) to 150
gm.